MCSA Full Course Day – 2 How to Create Machine on Hyper V
Welcome to IT For You. In the last post, we discussed about MCSA exams and virtualization. So, in today’s post, we will discuss how to create a virtual machine in Hyper-V. I hope that, as I told you in the last post, Microsoft provides everything for free to help you study. I also showed you how you can download Windows 10 Server OS for free from Microsoft’s website. So, I hope you have already downloaded it. If you’re still facing issues to downloading the file, please click on the below link.
Download Windows 10 VM Evaluation Image
Looking to practice creating virtual machines? Download a Windows 10 VM Evaluation Image for Educational purposes only. This image is time-limited and will expire after the trial period.
👉 Download Windows 10 VM Evaluation Image
Disclaimer: This image is shared for learning purposes only. Ensure compliance with Microsoft’s licensing terms.
Prerequisites for Using Hyper-V
Before diving into the steps, ensure that:
- Your system supports Hyper-V. Check your CPU for virtualization support (Intel VT-x or AMD-V).
- You are using a compatible version of Windows. Hyper-V is available on Windows 10 Pro, Enterprise, and Education editions, as well as Windows 11 Pro and Enterprise.
- Your BIOS/UEFI has virtualization enabled. Access your BIOS/UEFI settings during system boot to ensure virtualization is turned on.
- You have administrative privileges on your machine.

Step 1: Create a New Virtual Machine
- Open the New Virtual Machine Wizard:
- In Hyper-V Manager, click Action > New > Virtual Machine.
- Specify a Name and Location:
- Enter a name for your VM (e.g., “IT4UDC01”).
- Optionally, specify a location to store the VM files.
- Click Next.
- Choose a Generation:
- Generation 1: Supports legacy BIOS-based operating systems.
- Generation 2: Supports UEFI firmware and is recommended for modern OSes.
- Select the appropriate generation and click Next.
- Assign Memory:
- Allocate memory for the VM. For example, 2048 MB (2 GB) for lightweight OSes.
- Enable Dynamic Memory if you want the VM to adjust its memory usage based on demand.
- Click Next.
- Configure Networking:
- Select the virtual switch created earlier for network connectivity.
- Click Next.
- Connect a Virtual Hard Disk:
- Choose Create a virtual hard disk.
- Specify the size (e.g., 50 GB).
- Alternatively, use an existing virtual hard disk if you have one.
- Click Next.
- Install an Operating System:
- Select Install an operating system from a bootable image file.
- Browse to the ISO file of the OS you want to install (e.g., Ubuntu, Windows Server).
- Click Next.
- Complete the Wizard:
- Review the summary and click Finish to create the VM.
Step 2: Start and Configure the Virtual Machine

- Start the VM:
- In the Hyper-V Manager, right-click the VM and select Start.
- Connect to the VM:
- Right-click the VM and select Connect.
- This opens a console window for the VM.
- Install the OS:
- Follow the on-screen instructions to install the operating system from the ISO file.
- Configure the VM Settings (Optional):
- After installation, you can tweak VM settings by right-clicking the VM and selecting Settings.
- Adjust CPU, memory, hard disk, or other configurations as needed.
Troubleshooting Hyper-V Installation

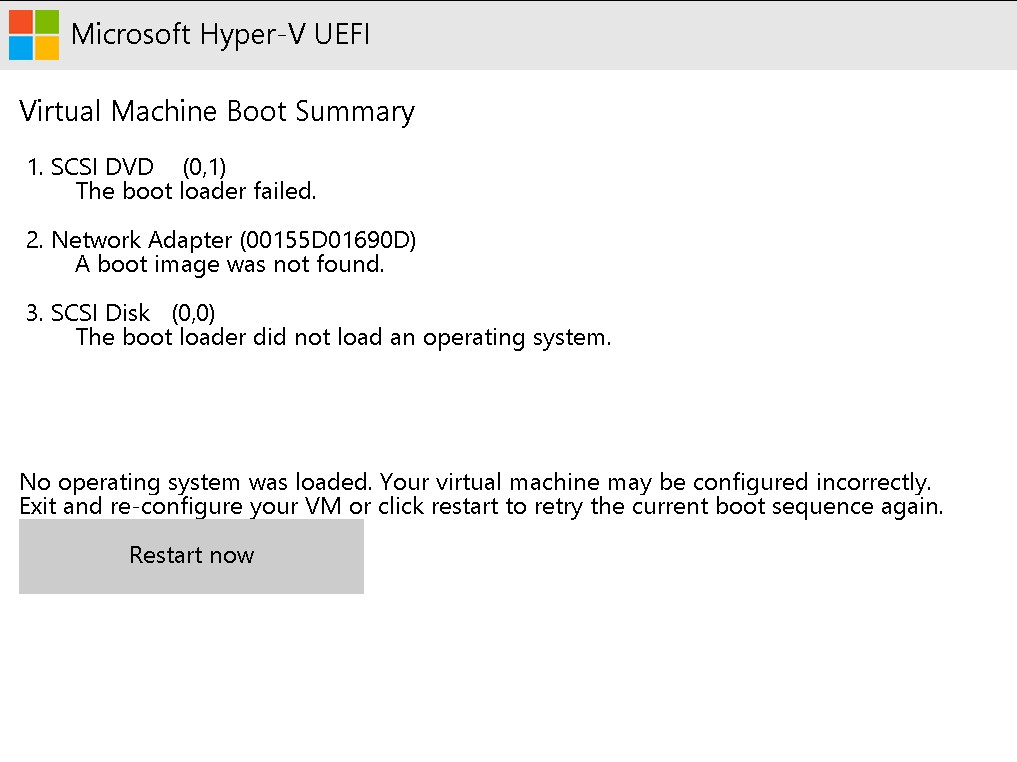
If you encounter above error, follow these steps to resolve it:
- Turn off your virtual machine (VM).
- Right-click on the VM and select Connect to access the virtual machine’s console.
- Start the VM and immediately begin pressing any key on your keyboard.
- Continue pressing a key until the installation window appears.
This should help bypass the error and allow the installation to proceed smoothly.
Best Practices for Managing Virtual Machines on Hyper-V

- Monitor Resource Usage:
- Ensure your host system has sufficient resources (CPU, RAM, disk space) for all running VMs.
- Take Snapshots:
- Before making significant changes to a VM, take a snapshot to easily revert if needed.
- Keep the Host and VMs Updated:
- Regularly update both the Hyper-V host and guest OSes to patch security vulnerabilities.
- Backup VMs:
- Periodically back up critical VMs to avoid data loss.
Conclusion
Creating a virtual machine on Hyper-V is straightforward and highly beneficial for testing, development, or production environments. By following the steps outlined above, you can set up and manage virtual machines efficiently. Hyper-V’s robust features and integration with Windows make it a powerful tool for virtualization.
Happy virtualizing!
For a detailed, step-by-step installation guide, check out my video where I explain each step in detail. If you’re still facing any issues, feel free to leave a comment below, and I’ll be happy to help you resolve them.
If you found this blog helpful, don’t forget to comment below, and like and share the video. Subscribe to the channel to stay updated with all upcoming tutorials. Your journey to mastering MCSA and virtualization starts here, and I’ll guide you every step of the way.
Stay tuned for the next post, where we will dive deeper into Day-3 Virtual Switch Manager in Hyper-V!