
File Server Setup and Folder Sharing in Windows Server — Complete Guide
Introduction
A Windows File Server is a powerful tool for managing and sharing data across a network. Whether you’re an IT professional or a beginner, understanding how to create shared folders, set permissions, and secure your files is essential. In this tutorial, we’ll explore step-by-step how to set up shared folders, control access, and protect your data in a corporate or home network.
Whether you’re running a small office network or managing an enterprise environment, understanding file servers will help you store, manage, and share files efficiently across your network.
What Is a File Server?
A file server is a computer that stores and manages files for other computers in the same network.
Instead of manually transferring files between devices, a file server allows multiple users to access shared data from one central location.
Key Benefits of a File Server:
- Centralized storage for company data
- Easy file sharing between departments
- Access control for better security
- Reduced duplication of files
Example:
If the Accounts and HR departments need to share files, a file server allows them to access the same folder without physically copying files between computers.
How to Share a Folder in Windows
You can share a folder in Windows in two main ways:
- Simple Sharing – Quick setup with minimal options.
- Advanced Sharing – Full control over permissions and access.
1. Simple Folder Sharing

Steps:
- Right-click the folder you want to share → Properties → Sharing tab.
- Click Share.
- Select users and set basic permissions.
Limitations: Only basic permissions are available. For security and auditing, use Advanced Sharing.
2. Advanced Folder Sharing

Steps:
- Right-click the folder → Properties → Sharing → Advanced Sharing.
- Check Share this folder.
- Click Permissions:
- By default, Everyone has Read-only access.
- You can grant Full Control or Change permissions.
- Click Apply → OK.
Tip: Use Advanced Sharing for detailed control and combine it with NTFS permissions for best security.
Accessing a Shared Folder from Another PC
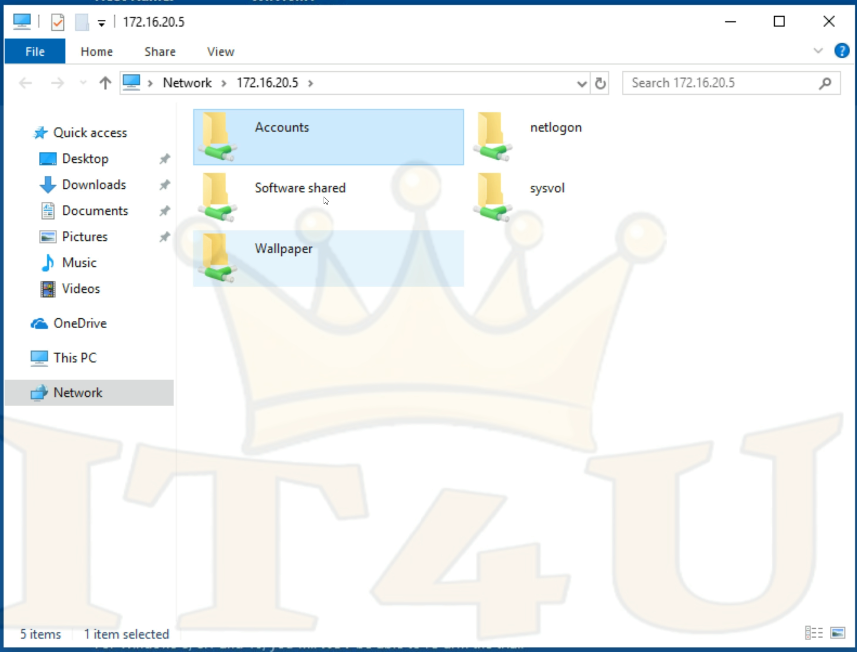
- Find your server’s IP (e.g.,
172.16.20.5). - On another PC, press Windows + R, type
\\172.16.20.5, and press Enter. - Enter the server’s username and password when prompted.
Hiding Shared Folders
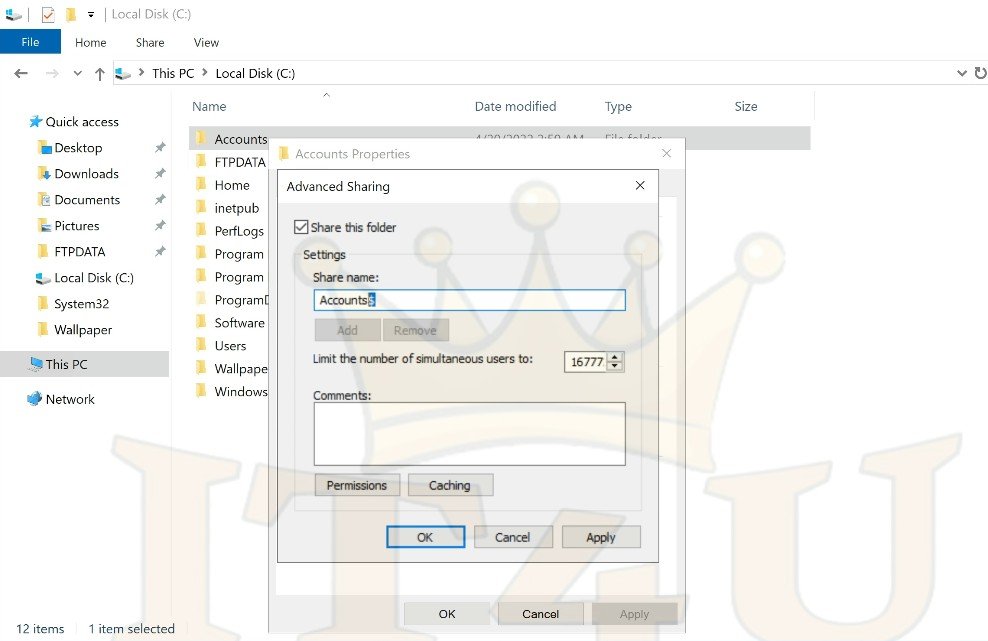
If you want a folder to be accessible but not visible when browsing the server:
- In Advanced Sharing, add a dollar sign
$to the share name (e.g.,Accounts$). - Users will need to type the exact path:
\\ServerName\Accounts$
Note: This only hides the folder from casual browsing. If a user knows the name and has permissions, they can still access it.
Viewing All Shared Folders
Method 1: Server Manager → File and Storage Services → Shares
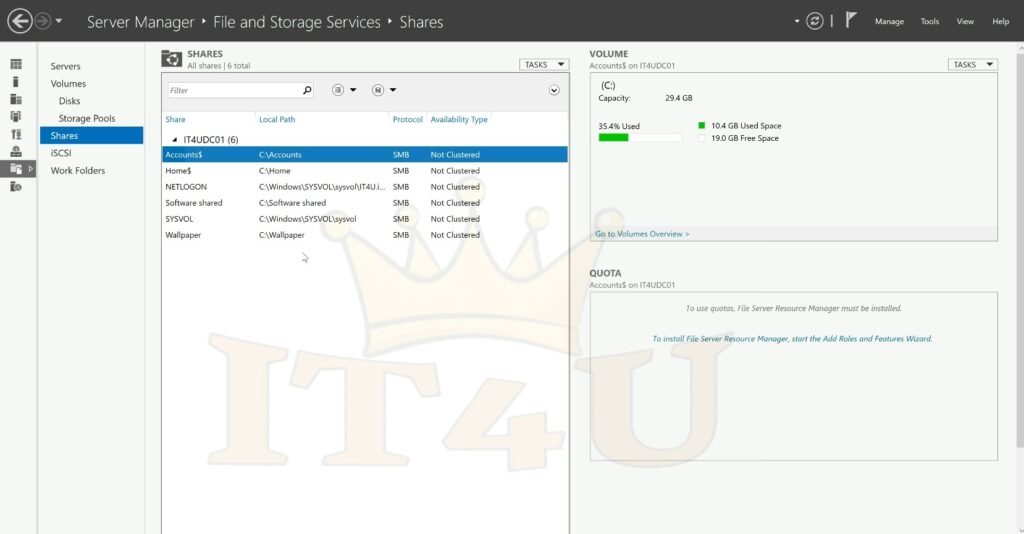
Method 2: Command Prompt → type:
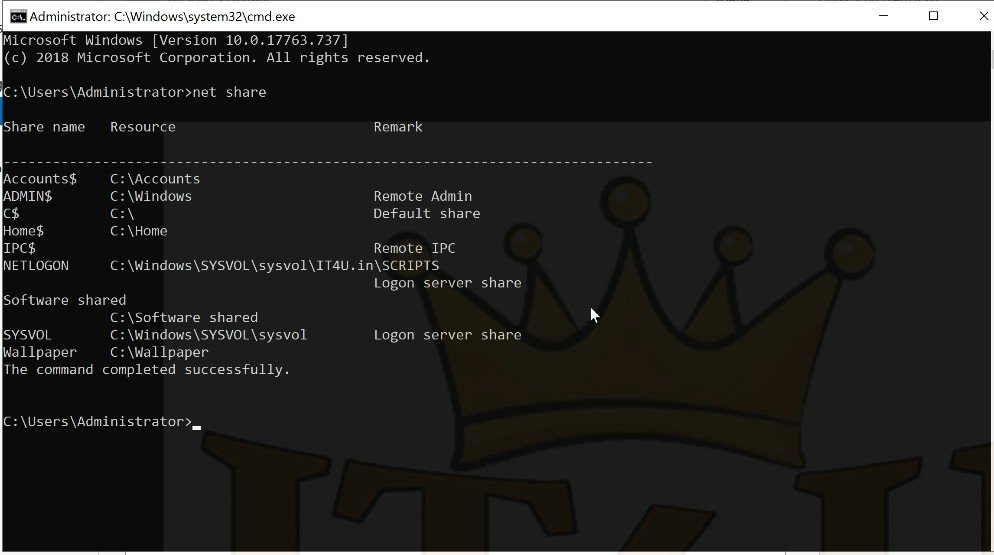
net share
This will display all shared folders, including hidden administrative shares like C$.
Combining Sharing with NTFS Permissions
For strong security:
- Use Advanced Sharing to control network access.
- Use the Security tab (NTFS permissions) to control what users can do inside the folder.
Example:
- Domain Users: Read-only access.
- IT Department: Full Control.
- Training Group: Modify but not delete.
Creating and Managing Users & Groups in Active Directory
To control access more effectively:
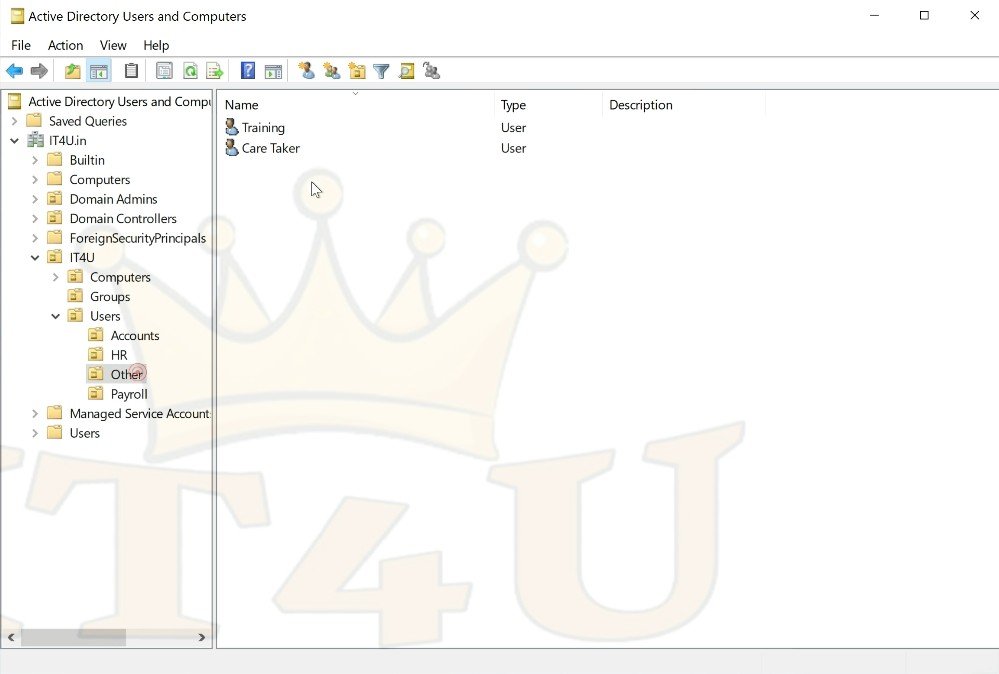
- Open Active Directory Users and Computers.
- Create a new user (e.g., “Training”).
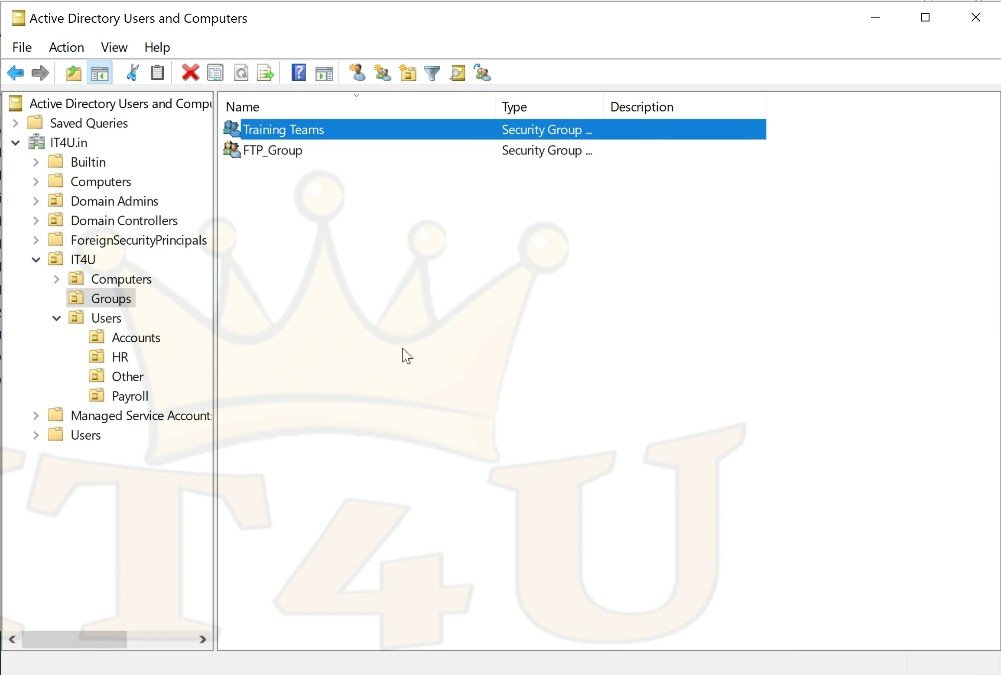
- Create a security group (e.g., “TrainingTeam”).
- Assign permissions to the group instead of individual users — easier to manage.
Restricting Access for Specific Users
If a user inherits permissions from a group:
- Go to folder Properties → Security → Advanced.
- Disable inheritance and convert permissions to explicit.
- Remove the unwanted group or user.
Best Practices for File Server Security
- Grant permissions to groups, not individual users.
- Use least privilege — only give users the access they truly need.
- Hide sensitive shares with
$and limit access via NTFS. - Regularly review
net shareoutput to monitor all shares. - Backup server data frequently.
Conclusion
A Windows File Server is an essential tool for centralized file management in businesses. By combining Advanced Sharing with NTFS permissions, you can ensure your data is both accessible to the right people and secure from unauthorized access.
With the steps above, you can create, hide, and manage shared folders effectively — from simple setups to advanced Active Directory–integrated security.
Watch the Full Step-by-Step Video Tutorial
For a detailed, step-by-step guide on configuring a Windows File Server, including shared folders, hidden shares, Advanced Sharing, NTFS permissions, and Active Directory integration, watch our full video tutorial:
Follow along in the video to see every configuration step in action — perfect for both IT beginners and professionals.


Add comment